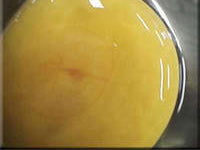
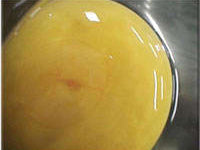
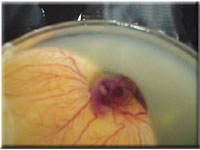
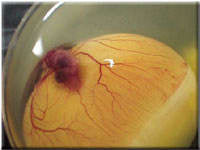
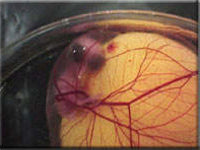
Day 3
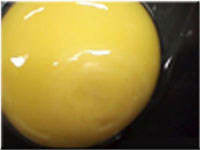
Egg candling is one of the most important techniques in successful egg incubation. By shining a strong light through the shell, you can monitor embryo development, detect fertility, and identify problems before they affect hatch success. This complete guide explains how to candle eggs correctly, what signs to look for, and how to interpret embryo development at every stage.
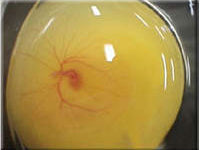
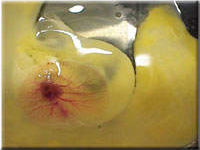
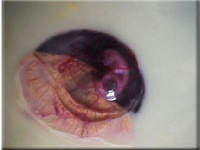
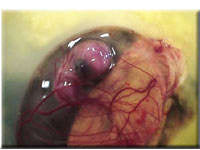
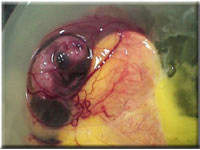
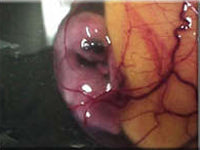
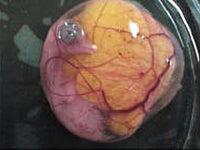
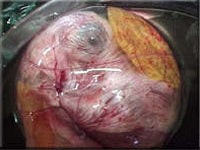
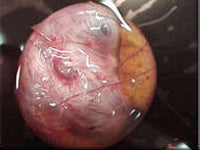
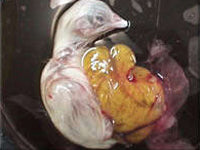
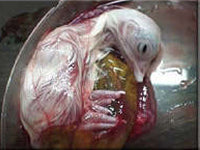
Egg candling is the process of using a focused light source to look inside an incubated egg. The light reveals embryo growth, blood vessels, air cell size, and potential development issues without breaking the shell.
The term “candling” comes from the original method of using a candle flame to illuminate eggs in a dark room. However, candles were unstable and produced excessive heat, which could damage fertile eggs. Modern hatchers now use LED flashlights or specialized candling devices for safer and clearer results.
Eggs should remain outside the incubator for as little time as possible. Brief candling sessions of 5–10 minutes are ideal. Even 20–30 minutes poses no risk if performed occasionally and carefully.
Consistent temperature, accurate humidity control, proper ventilation, and careful egg turning are equally important alongside candling. Monitoring development early prevents losses and increases hatch success.